.
ctys-uc-CentOS - Use-Cases for Setup of CentOS
The current document shows the basic installation of CentOS, which is basically a derivative of RedHat(TM) Linux variant.
The following host environment is used here:
The following client environment is used here:
The following common assumptions and simplifications are choosen, when multiple approaches are valid.
.
The installation for the following variants has to be performed by the appropriate standard setup of the HostOS, which quite straight forward:
ctys-distribute -F 2 -P UserHomeCopy root@myHost
ctys -t cli -a create=l:myHost root@myHost
ctys-plugins -T all -E
The following steps are required for a RPM based setup on CentOS. The installation is relocatable, but located at '/opt', and installed locally by 'ctys-distribute'.
rpm -i ctys-base-01.11.011.noarch.rpm
/opt/ctys-01.11.011/bin/ctys-distribute -F 2 -P UserHomeCopy
ctys-xdg --menu-create
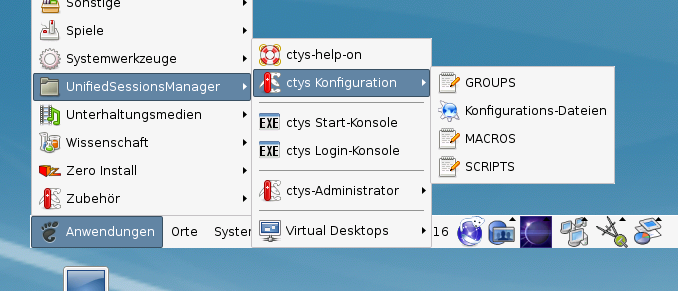
The setup of the Gnome Menu is quite simple, the contained tool ctys-xdg sets up a standard menu by the call:
ctys-xdg --menu-create
The call
ctys-xdg --menu-cancel
removes the installed files. For current version no checks for changed files is done.
The menues could be edited and extended by the call
ctys-xdg --menu-edit
which opens the related directories for modification of '*.menu', '*.desktop', and '*.directory' files.
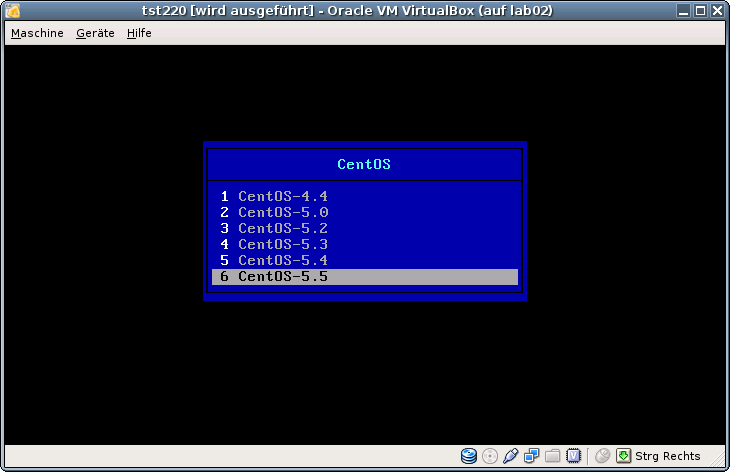
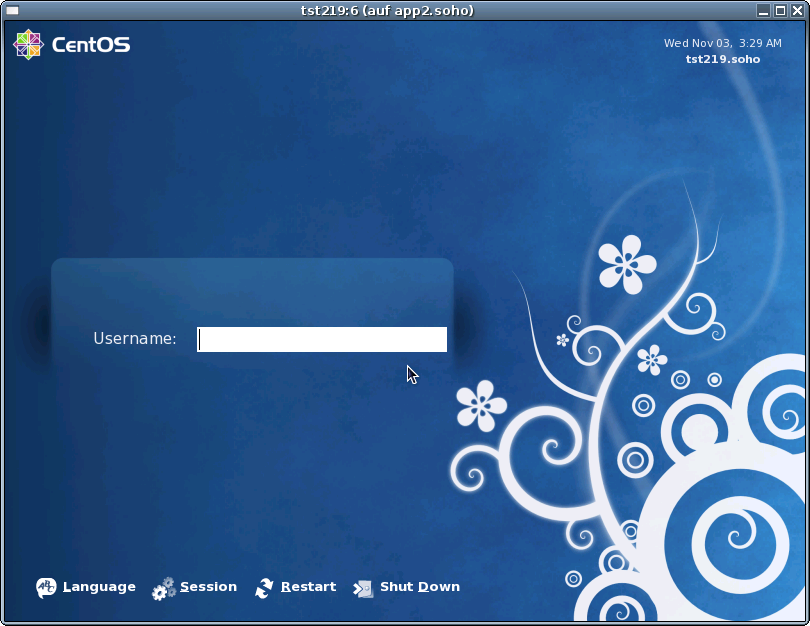
The demo example VM is here named tst219, this is the hostname of GuestOS too.
ssh -X app2When just the processing node of mounted filesystem has to be changed, the following call could be applied. This works in case of identical mount paths:
ctys -t cli -a create=l:tst220,cd:$PWD root@lab02
mkdir tst219
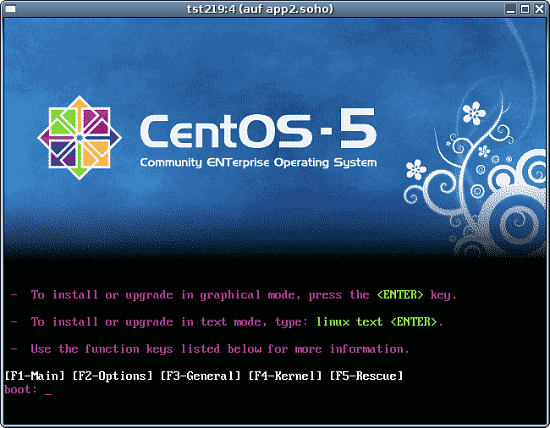
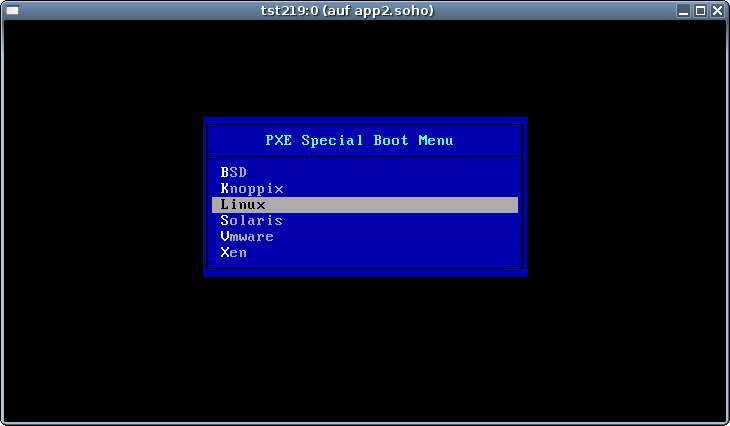
  ARCH=x86_64 \
  DIST=CentOS \
  DISTREL=5.5 \
  OS=Linux \
  OSREL=2.6 \
  ctys-createConfVM -t qemu --label=tst219
This call creates a virtual image(hda.img), the call-wrapper(tst219.sh), and the configuration file(tst219.ctys). The files are created from templates by assigning configuration values either from pre-configured default values, or interactive variation. The whole process of createion could be batch-proceeded by using the either teh --auto, or the --auto-all option when appropriate default values are preconfigured. When no MAC database nor DHCP is available, the MAC and IP addresses might be provided too.
./tst219.sh --console=vnc --vncaccessdisplay=47 --print --instmode --check
./tst219.sh --console=vnc --vncaccessdisplay=47 --print --instmodeAlternatively a remote call could be proceeded:
ctys -t qemu -a create=l:tst219,b:${VMPATH},instmode app2
  ctys \
     -t qemu \
     -a create=l:tst219,b:${VMPATH},instmode:PXE%default%HDD%default%init \
     app2
The creation of the raw VM is first step to be executed at the host oeprating system. This could be either performed locally or remote and requires the usage of the provided tools by VirtualBox(TM).
ssh -X lab02
VirtualBox
ctys-createConfVM -t vbox --label=tst137 --levo
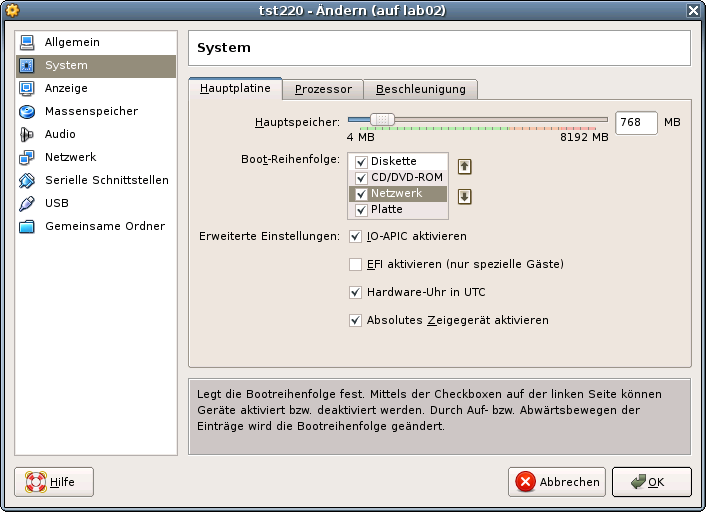
  DIST=CentOS \
  DISTREL=5.5 \
  OS=Linux \
  OSREL=2.6 \
  MAC=00:50:56:13:12:14 \
  IP=172.20.2.20 \
  ARCH=x86_64 \
  ctys-createConfVM --label=tst220 -t vbox
  Not all values require to be set, some will be requested later
  by dialogue.
  Thus it is not neccessary to have values assigned to the complete
  displayed set.


  Actually used sources for default values:
    no-marker  = Pre-Set value, either from defaults configuration,
                 or by commandline.
    no-value   = Either requested by dialog later, or the defaults
                 of the finally called
                 application are used.
    (c)        = Read from actual configuration file, e.g. vmx-file.
    (d)        = Read from database.
    (g)        = Dynamically generated.
    (h)        = Used from current host as default.
    (m)        = Received from mapping definitions.

  Applicable modifications:
    blue       = By call option, defines dependency for others.
    green      = By environment, 'could be set almost independent'
                 from other values.
    cyan       = By miscellaneous facilities, but is dependent from
                 others.
                 E.g. LABEL defines by convention the network 'hostname',
                 thus the TCP/IP params.
                 This could ..., but should not be altered!

  Most of the missing values will be fetched during actual execution of
  this tool by dynamic evaluation.


                        VAR name:Initial Value

                   C_SESSIONTYPE:VBOX
                           LABEL:tst220
                             MAC:00:50:56:13:12:14 (c)
                              IP:172.20.2.20 (m)
                          BRIDGE:
                            DHCP:
                         NETMASK:
                             TCP:
                         GATEWAY:

                          EDITOR:acue

                            UUID:e982e0c4-2de8-40f1-aa6e-8c615096b37c (c)

                            DIST:debian (h)
                         DISTREL:5.5
                              OS:Linux
                           OSREL:2.6

                            ARCH:x86_64
                     ACCELERATOR:HVM  (c)
                             SMP:1 (c)
                         MEMSIZE:768 (c)
                      KBD_LAYOUT:de

                     STARTERCALL:/usr/bin/VirtualBox

                 DEFAULTBOOTMODE:HDD

               DEFAULTINSTTARGET:/mntn/vmpool/vmpool05/vbox/test/...
                                 ...tst-ctys/tst220/tst220.vdi
          HDDBOOTIMAGE_INST_SIZE:8192M

                         VMSTATE:ACTIVE


  Remember that his is a draft pre-display of current defaults.
  No consistency-checks for provided values are performed at this stage.
  Some missing values are evaluated at a later stage dynamically.
ffs.
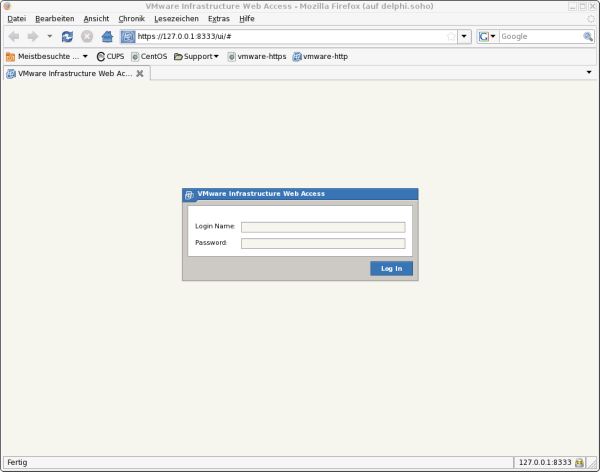
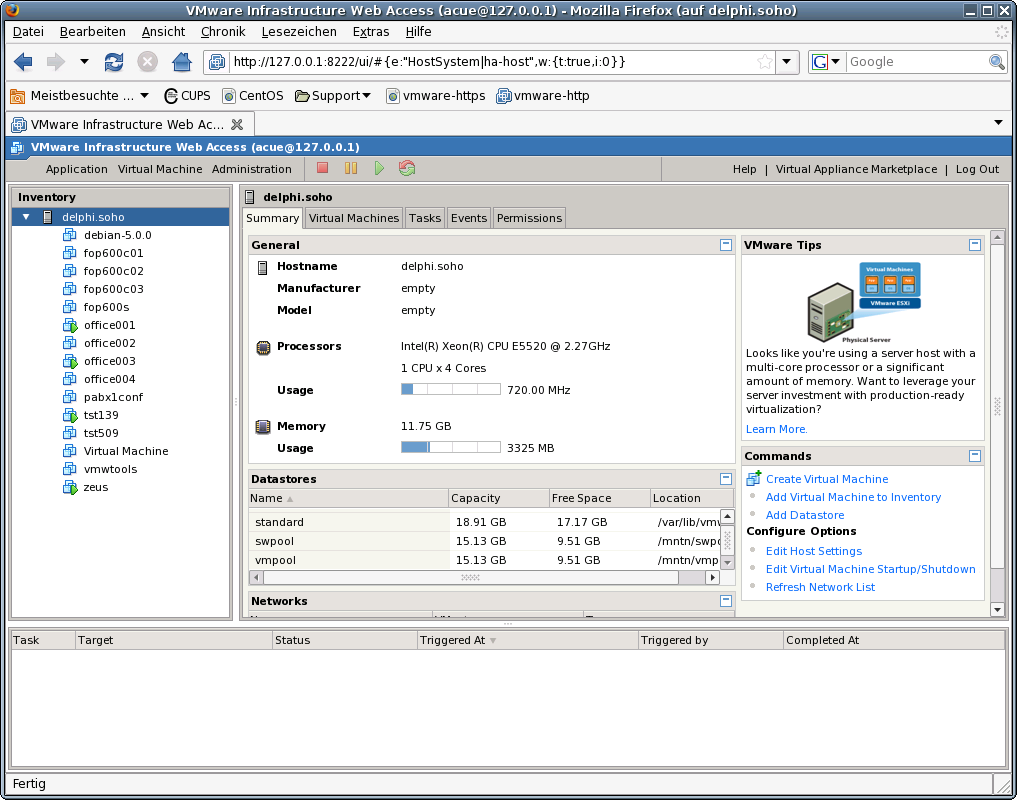
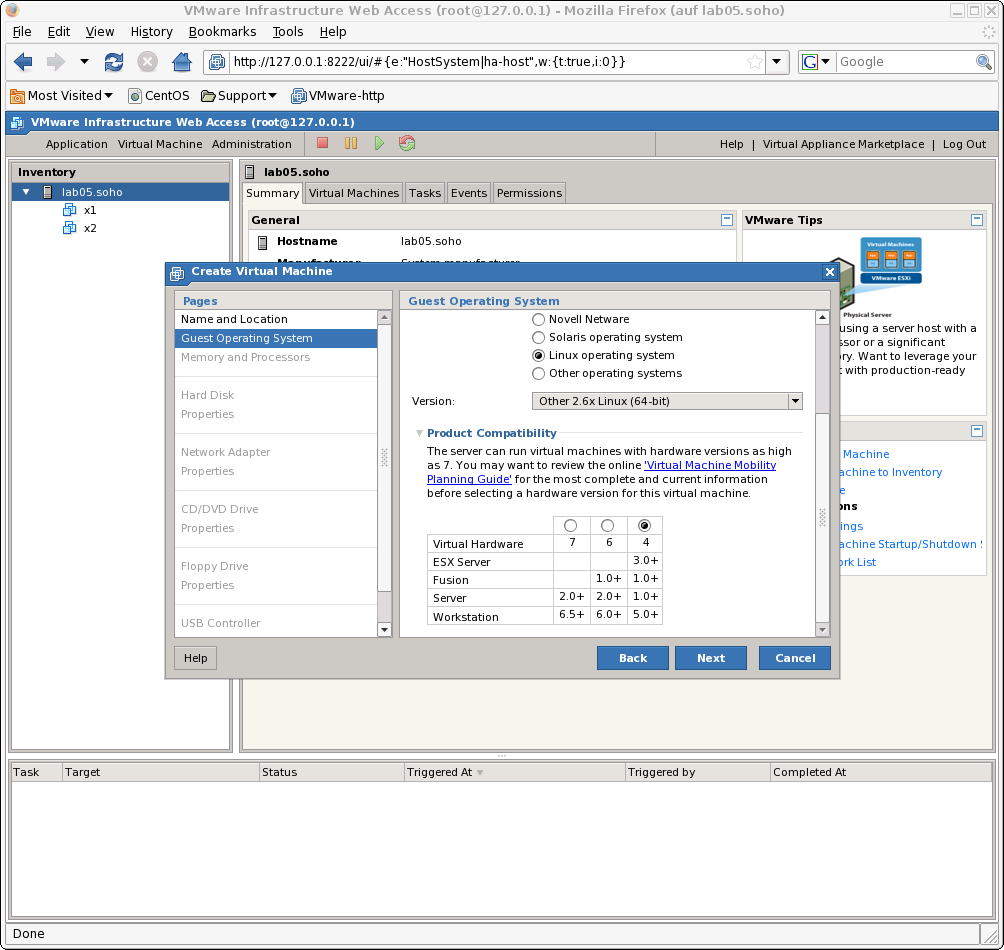
The installation of raw machine is performed here by the native vendor supported tools. These could be started e.g. by using the X11 plugin and execution of a remote command. The advance is the transparent encryption on the inter-node connections by SSH. Ths e.g. in case of problems with the https port the unencrypted http GUI could still be used in a secure manner for network connections. All connections are tunneld by OpenSSH, here the X-displayforwarding with the '-X' option. The start of the VMW console for RHEL-5.5 and VMware Server-2.0.2 is:
ctys -t x11 -a create=l:vmwcon,cmd:vmware root@lab05
This starts the default fornt end, here the Firefox browser.
REMARK:
The current version of the UnifiedSessiosnManager requires by convention the coallocation of
the VMX file and the boot HDD.
Particularly the enumeration of VMs requires the presence of the VMX file.
In some cases - for Server-2 when the allocation is altered from the defined storage - these are stored
by default into different directories.
This has to be considered for the allocation of new VMs.
The virtual machine should be selected as hardware version 4 when maximum compatibility is required.
For tight and vendor independent management of the VMs and PMs the MAC addresses should be assigned individually to each machine and centrally managed by DHCP.
In addition the UUID of the VM should be set to fixed by maunal edition of the VMX file.
This has advantages for unambiguity in networked operating environments.
The UUID is part of the <machine-address> and therefore stored within the database and could be used
for persistent addressing.
Thus should not be changed by a harmless move, due to an algorithm for assurance of generic unambiguity.
Once the setup is finished by means of the vendor tools, the following steps of installation
could be proceeded either continued solely by the vendor provided environment, or by application
of the UnifiedSessionsManager toolset.
The instmode for adaption of the actual boot configuration is not yet supported, thus
a normal startup by management of boot and installmedia by the vendor products has to be applied.
The following operational procedures within the GuestOS are similar for all hypervisors.
Just a few exceptions exist for installing specific driver sets - so called Tools available e.g. for
almost all VMware(TM) products.
These have to be mounted as install media and installed by the provided installer.
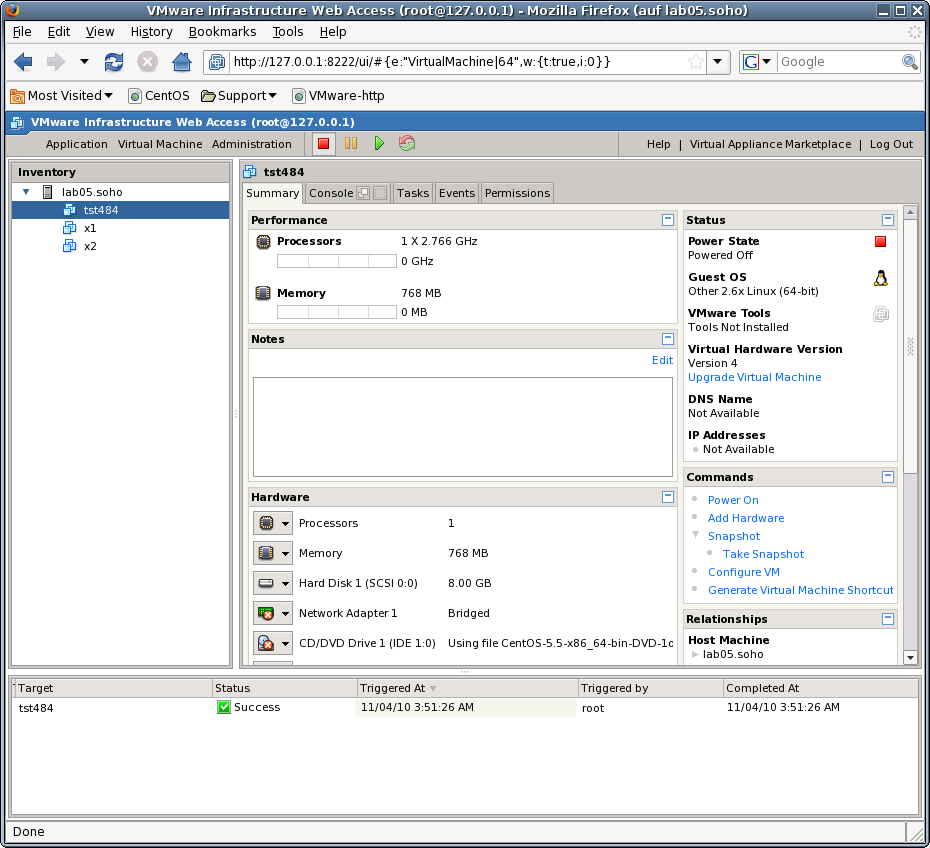
The following demonstrates the reallocation of the machine files to a common directory with the storage devices. The virtual HDD is stored within the directory
[Datastore] vmpool05/vmw/test/tst-ctys/tst484/tst484.vmdk
whereas the VM configuration files are stored by the system in the datastore to
[Datastore] tst484/...
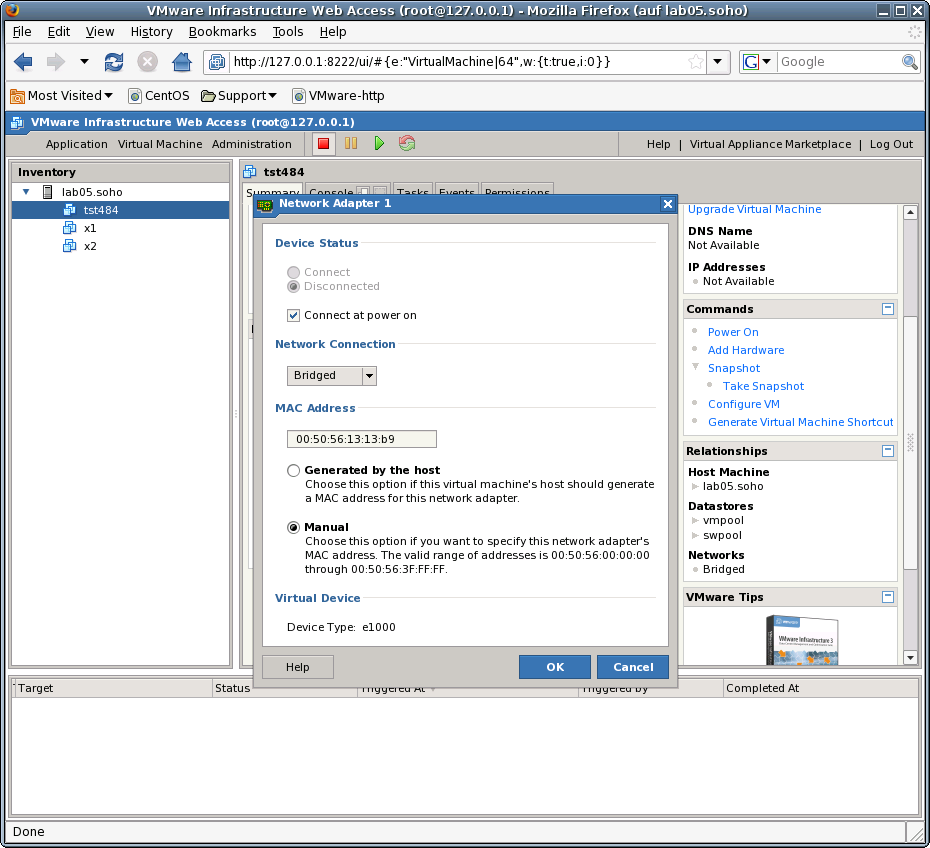
  scsi0:0.fileName = "/mntn/vmpo ..."
  ide1:0.fileName = "/mntn/swpool/UNIXDist..."
uuid.action = "keep"
  ethernet0.addressType = "generated"
  ethernet0.generatedAddress = "00:0c:29:9c:6a:6a"
  ethernet0.addressType = "static"
  ethernet0.address = "00:50:56:13:11:33"
displayName = "tst484"which is the so called LABEL.
For the management of the GuestOSs and integration into the database of the UnifiedSessionsManager the
inventory functions by ctys-createConfVM and ctys-vdbgen should be at least post-applied once after
finishing the guest installation.
The installed GuestOS is here the same as the HostOS, with the only difference, that the architecture has to be set to 'ARCH=i386'. This reduces the call for configuration creation to:
ARCH=i386 ctys-createConfVM -t vmw --label=tst484
The --levo display is:
  Not all values require to be set, some will be requested later by dialogue.
  Thus it is not neccessary to have values assigned to the complete displayed set.


  Actually used sources for default values:
    no-marker  = Pre-Set value, either from defaults configuration,
                 or by commandline.
    no-value   = Either requested by dialog later, or the defaults
                 of the finally called
                 application are used.
    (c)        = Read from actual configuration file, e.g. vmx-file.
    (d)        = Read from database.
    (g)        = Dynamically generated.
    (h)        = Used from current host as default.
    (m)        = Received from mapping definitions.

  Applicable modifications:
    blue       = By call option, defines dependency for others.
    green      = By environment, 'could be set almost independent'
                 from other values.
    cyan       = By miscellaneous facilities, but is dependent from others.
                 E.g. LABEL defines by convention the network 'hostname',
                 thus the TCP/IP params.
                 This could ..., but should not be altered!

  Most of the missing values will be fetched during actual execution of
  this tool by dynamic evaluation.


                     VAR name:Initial Value

                        LABEL:tst484
                          MAC:00:50:56:13:13:B9 (c)
                           IP:172.20.6.184 (m)
                       BRIDGE:
                         DHCP:
                      NETMASK:
                          TCP:tst484 (m)
                      GATEWAY:

                       EDITOR:acue

                         UUID:564d99fb5a6c2897edce5b14279c6a6a (c)

                         DIST:CentOS (h)
                      DISTREL:5.5 (h)
                           OS:Linux (h)
                        OSREL:2.6.18-194.el5 (h)

                         ARCH:x86_64 (h)
                  ACCELERATOR:
                          SMP:
                      MEMSIZE:768 (c)
                   KBD_LAYOUT:de

                  STARTERCALL:/usr/bin/vmware


                      VMSTATE:ACTIVE


  Remember that his is a draft pre-display of current defaults.
  No consistency-checks for provided values are performed at this stage.
  Some missing values are evaluated at a later stage dynamically.
The result could be inspected e.g. by the following call with one of the standard macros. Called within the directory of the VM, therefore starting at the scan-base 'b:$PWD'.
ctys -t vmw "{MACRO:enumdefault},b:$PWD"
Resulting in the output:
  label |stype|accel|distro|distrorel|os   |osrel     |PM        |if|TCP
  ------+-----+-----+------+---------+-----+----------+----------+--+------------
  tst484|VMW  |     |CentOS|5.5      |Linux|2.6.18-194|lab05.soho|0 |172.20.6.184
ffs.
ffs.
ffs.
ffs.
The examples for installaltion of Xen GuestOSs are performed here on a RedHat-Enterprise-Linux - RHEL-5.5 server. The procedures are almost identicel to other derived distributions, e.g. CentOS, ScientificLinux, or EnterpriseLinux.

The Xen files, including the Python conf-file and the initial virtual devices are created by the utility
ctys-createConfVM.
Thus e.g. the MAC address has to be provided when networking is required.
In some cases - e.g. for OpenSUSE or debian - it might be required to provide the virtual bridge too.
This is due to internal detection a so called Xen-Bridge by searching for the first bridge containing a
'pethX' device, which sometimes varies.
E.g. for debian the bridge is called in some releases simply 'eth0'.
Thus when errors with networking due to missing bridge occurs, than just set an appropriate default.
If this still does not suffice, than the variable 'FORCE_THIS_IS_XEN_BRIDGE=br0' may help.
But be aware, when the machine is executed on different machines with various HostOSs, e.g. viy NFS.
Than the bridge names may vary, and may require to be adapted.
This is the reason of dynamic evaluation for the networking devices.
Now execute the call for the complete creation of the VM.
  MAC=00:50:56:13:13:B7 \
  DIST=CentOS \
  DISTREL=5.5 \
  OS=Linux \
  OSREL=2.6.18 \
  ctys-createConfVM -t XEN --label=tst482
This creates with the --levo check the output:
  Not all values require to be set, some will be requested later by dialogue.
  Thus it is not neccessary to have values assigned to the complete displayed set.


  Actually used sources for default values:
    no-marker  = Pre-Set value, either from defaults configuration,
                 or by commandline.
    no-value   = Either requested by dialog later, or the defaults
                 of the finally called
                 application are used.
    (c)        = Read from actual configuration file, e.g. vmx-file.
    (d)        = Read from database.
    (g)        = Dynamically generated.
    (h)        = Used from current host as default.
    (m)        = Received from mapping definitions.

  Applicable modifications:
    blue       = By call option, defines dependency for others.
    green      = By environment, 'could be set almost independent'
                 from other values.
    cyan       = By miscellaneous facilities, but is dependent from others.
                 E.g. LABEL defines by convention the network 'hostname',
                 thus the TCP/IP params.
                 This could ..., but should not be altered!

  Most of the missing values will be fetched during actual execution of
  this tool by dynamic evaluation.


                     VAR name:Initial Value
                 C_SESSIONTYPE:XEN
                        LABEL:tst482
                          MAC:00:50:56:13:13:B7
                           IP:172.20.6.182 (m)
                       BRIDGE:
                         DHCP:
                      NETMASK:
                          TCP:tst482 (m)
                      GATEWAY:

                       EDITOR:acue

                         UUID:e589efe5-5fe5-4de8-890c-43484b5a64e4 (h)

                         DIST:CentOS
                      DISTREL:5.5
                           OS:Linux
                        OSREL:2.6.18
                         ARCH:x86_64 (h)
                  ACCELERATOR:HVM  (h)
                          SMP:1
                      MEMSIZE:768
                   KBD_LAYOUT:de

                  STARTERCALL:/usr/sbin/xm
                  WRAPPERCALL:/usr/bin/sudo.sh

              DEFAULTBOOTMODE:HDD

            DEFAULTINSTTARGET:/mntn/vmpool/vmpool05/xen/test/tst-ctys/tst482/xvda.img
       HDDBOOTIMAGE_INST_SIZE:8G
  HDDBOOTIMAGE_INST_BLOCKSIZE:256M
  DDBOOTIMAGE_INST_BLOCKCOUNT:32
    HDDBOOTIMAGE_INST_BALLOON:y

              DEFAULTINSTMODE:CD
                 INSTSRCCDROM:/mntn/swpool/UNIXDist/centOS/5.5/inst/isos/...
                              ...x86_64/CentOS-5.5-x86_64-bin-DVD-1of2.iso
            DEFAULTINSTSOURCE:/mntn/swpool/UNIXDist/centOS/5.5/inst/isos/...
                              ...x86_64/CentOS-5.5-x86_64-bin-DVD-1of2.iso

                   BOOTLOADER:/usr/lib/xen/boot/hvmloader
                  INST_KERNEL:/usr/lib/xen/boot/hvmloader

                      VMSTATE:ACTIVE


  Remember that his is a draft pre-display of current defaults.
  No consistency-checks for provided values are performed at this stage.
  Some missing values are evaluated at a later stage dynamically.
The following call starts the initial installation of the VM:
ctys -t xen -a create=l:tst482,reuse,b:$PWD,instmode root@lab03
ffs.
ctys -t qemu -a cancel=l:tst219,b:${VMDIRECTORYPATH},poweroff app2
The syntax for this is similar for all supported hypervisors.
The following call starts the VM into standard operations.
ctys -t qemu -a create=l:tst219,b:${VMDIRECTORYPATH} app2
In case of a common mounted NFS filesystem for the pool VMs for simplicity just change into the directory of the VM on any machine. Call for the first check ctys-vdbgen with the --stdio option for display only.
ctys-vdbgen --append --base=$PWD --stdio -- lab02
When the result is displyed correctly just call
ctys-vdbgen --append --base=$PWD -- lab02
The following output should be displayed:
  Prepare execution-call:

  Require DB-PATH,        USE: DEFAULT_DBPATHLST="/homen/acue/.ctys/db/default"
  Require DB-PATH,        USE: -o => "/homen/acue/.ctys/db/default"
  APPEND mode                : ON(1)
  STDIO mode off             : OFF(0)
  Set TYPE scope          ADD: DEFAULT="-t ALL"
  Preload TYPE set        ADD: DEFAULT="-T ALL"
  For splitted operations ADD: DEFAULT="-b sync,seq "
  Nameservice cache       OFF: DEFAULT="-c off "
  Data cache              OFF: DEFAULT="-C off "

  Resulting ENUMERATE     ADD: DEFAULT="-a enumerate=...
      ...matchvstat:active%disabled%empty,machine,\
      b:/mntn/vmpool/vmpool05/vbox/test/tst-ctys/tst137 \
      -C off  -c off  -T ALL  "

  -> generate DB(may take a while)...
  -----------------------------------
  START:08:38:35
  ------


  ------
  END:08:39:03
  DURATION:00:00:28
  -----------------------------------
  RET=0
  -----------------------------------

  Cached data:

    Mode:                    APPEND
    Pre-Appended:            834 records
    Appended:                1 records
    Fetched Records Raw:      records
    Fetched Records Unique:   records
    Final:                   835 records

  -----------------------------------
     ...finished.
This shows that only one entry is appended to the existing database with 834 VM-Entries. Now check the database entry by calling:
ctys-vhost tst137
The following result should be displayed:
  label |stype|accel|distro|distrorel|os   |osrel|PM   |if |TCP
  ------+-----+-----+------+---------+-----+-----+-----+---+------------
  tst137|VBOX |     |CentOS|1.0.0    |Linux|2.6  |lab02|0  |172.20.2.241
Now call the menue item for start of the VM 'tst137'.
The created cacheDB record for thr VM 'tst137' is now automatically visible in the
list of startable virtual machines.
Confirm the selected entry.
Almost absolutely required is a Single-Sign-On facility for OpenSSH. This is due to the required multiple remote remote calls for a number of operational modes. Recommended is either the usage of SSH-Keys, or Kerberos by GSSAPI.
Apply standard procedure:
ctys-distribute -F 2 -P UserHomeCopy root@tst137
Call CLI plugin:
ctys -t cli -a create=l:tst137 root@tst137
Call ctys-plugins:
ctys-plugins -T all -E
ffs.
Call VNC plugin:
ctys -t vnc -a create=l:tst137,reuse root@tst137
Call VNC plugin:
ctys -t x11 -a create=l:tst137,reuse root@tst137
ctys-configuration-QEMU(7) , ctys-configuration-VBOX(7) , ctys-createConfVM(1) , ctys-plugins(1) , ctys-QEMU(1) , ctys-uc-QEMU(7) , ctys-uc-VBOX(7) , ctys-vhost(1) , ctys-uc-VMW(7) , ctys-VBOX(1) , ctys-VMW(1) , vmware(1)
For System Tools:
CentOS: [ http://www.centos.org ]
RedHat(TM): [ http://www.redhat.com ]
| Arno-Can Uestuensoez | <https://arnocan.wordpress.com/> |
| <https://unifiedsessionsmanager.sourceforge.io/> | |
| <https://github.com/unifiedsessionsmanager> | |
 |
Copyright (C) 2008, 2009, 2010, 2011, 2020 Ingenieurbuero Arno-Can Uestuensoez
For BASE package following licenses apply,
This document is part of the DOC package,

For additional information refer to enclosed Releasenotes and License files.